
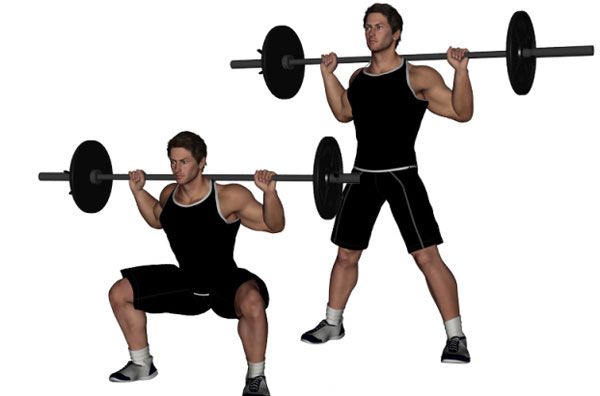
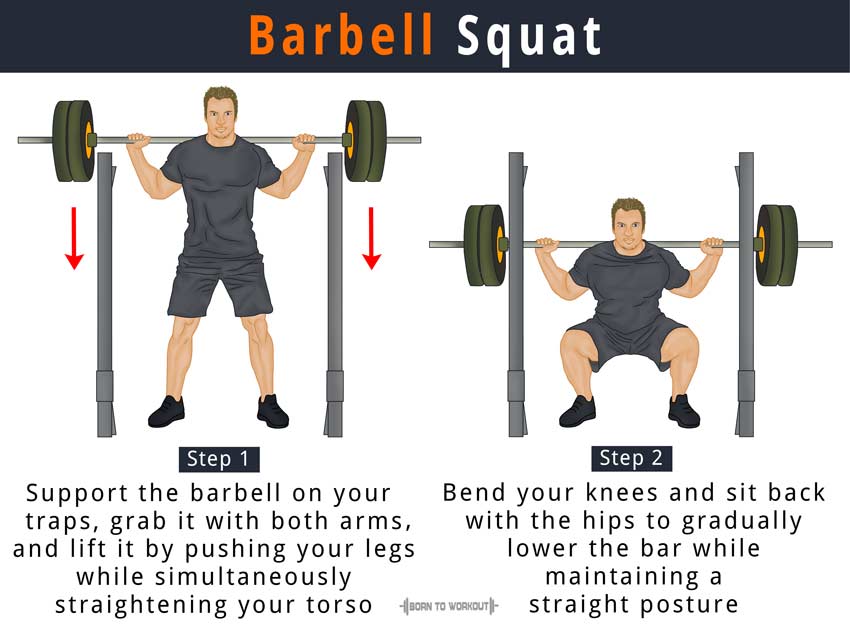
Wide stance squats are a variant of traditional squats that have become increasingly popular in recent years. This exercise involves placing your feet shoulder-width apart or wider and squatting down with your knees and hips bent to a 90-degree angle. This article will explore the many benefits of wide stance squats and why you should incorporate them into your exercise routine.
Builds Stronger Glutes and Hamstrings

Wide stance squats are an excellent exercise for building stronger glutes and hamstrings. This is because the wider stance places more emphasis on these muscle groups, which are essential for functional movement and athletic performance. Stronger glutes and hamstrings also help prevent injuries by providing stability and support to the lower back and knees.
Improves Hip Mobility

Wide stance squats can also improve hip mobility by stretching the hip adductors and abductors. These muscles are often neglected in traditional squats, which can lead to tightness and restricted movement. By incorporating wide stance squats into your routine, you can improve your range of motion and reduce the risk of hip injuries.
Increases Core Strength

Wide stance squats also help to increase core strength by engaging the abdominal muscles. This is because the wider stance forces your body to work harder to maintain balance and stability throughout the movement. A strong core is essential for good posture, balance, and overall physical health.
Boosts Athletic Performance

Wide stance squats are an excellent exercise for boosting athletic performance. This is because they mimic many of the movements required in sports, such as running, jumping, and changing direction. By incorporating wide stance squats into your routine, you can improve your overall strength, power, and agility, which can translate into improved performance on the field or court.
Increases Overall Strength
Wide stance squats are also an excellent exercise for increasing overall strength. This is because they work multiple muscle groups at once, including the quads, glutes, hamstrings, and core. By incorporating wide stance squats into your routine, you can improve your overall strength and build a strong, functional body.
Reduces Lower Back Pain

Wide stance squats can also help to reduce lower back pain by strengthening the muscles that support the spine. This is because the wider stance places more emphasis on the glutes and hamstrings, which are essential for stabilizing the lower back. By incorporating wide stance squats into your routine, you can reduce the risk of lower back injuries and improve your overall spinal health.
Improves Posture

Wide stance squats can also help to improve your posture by strengthening the muscles that support the spine and pelvis. This is because the wider stance forces your body to maintain a more upright position, which can help to correct imbalances and weaknesses in your posture. By incorporating wide stance squats into your routine, you can improve your overall posture and reduce the risk of back and neck pain.
Increases Fat Burning

Wide stance squats are also an excellent exercise for increasing fat burning. This is because they work multiple muscle groups at once, which can help to increase your overall metabolic rate. By incorporating wide stance squats into your routine, you can burn more calories and lose weight more effectively.
Improves Balance and Stability
Wide stance squats can also help to improve your balance and stability by engaging the muscles that control these functions. This is because the wider stance forces your body to work harder to maintain balance and stability throughout the movement. By incorporating wide stance squats into your routine, you can improve your overall balance and reduce the risk of falls and injuries.
Reduces Knee Pain

Wide stance squats can also help to reduce knee pain by strengthening the muscles that support the knee joint. This is because the wider stance places more emphasis on the glutes and hamstrings, which are essential for stabilizing the knee. By incorporating wide stance squats into your routine, you can reduce the risk of knee injuries and improve your overall knee health.
Improves Cardiovascular Health

Wide stance squats are also an excellent exercise for improving cardiovascular health. This is because they work multiple muscle groups at once, which can help to increase your heart rate and improve your overall cardiovascular fitness. By incorporating wide stance squats into your routine, you can improve your overall health and reduce the risk of cardiovascular disease.
Increases Flexibility

Wide stance squats can also help to increase flexibility by stretching the muscles in your hips, groin, and lower back. This is because the wider stance places more emphasis on these muscle groups, which are often neglected in traditional squats. By incorporating wide stance squats into your routine, you can improve your overall flexibility and reduce the risk of injuries.
Improves Mental Health

Wide stance squats are also an excellent exercise for improving mental health. This is because they release endorphins, which are natural chemicals that improve mood and reduce stress. By incorporating wide stance squats into your routine, you can improve your overall mental health and reduce the risk of depression and anxiety.
Conclusion
Wide stance squats are an excellent exercise for improving overall health and fitness. They can help to build stronger glutes and hamstrings, improve hip mobility, increase core strength, boost athletic performance, reduce lower back pain, improve posture, increase fat burning, improve balance and stability, reduce knee pain, improve cardiovascular health, increase flexibility, and improve mental health. By incorporating wide stance squats into your routine, you can enjoy these many benefits and achieve a strong, functional body.
Related video of Wide Stance Squat Benefits

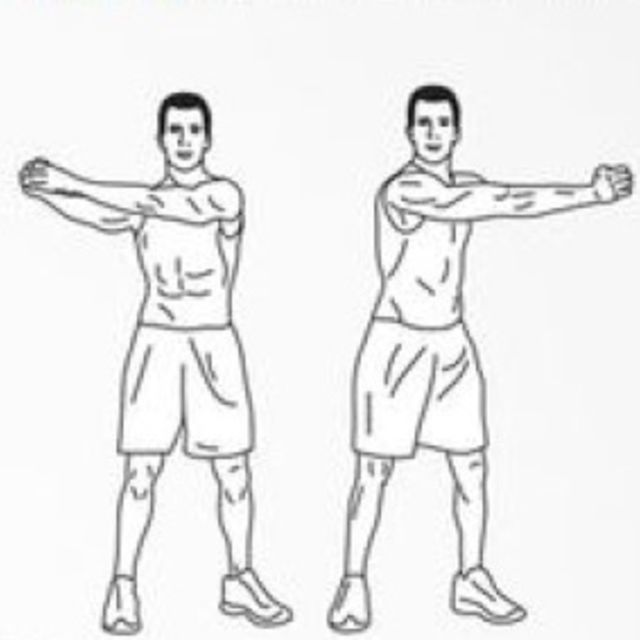
Side to side lunges, also known as lateral lunges or side lunges, are a great exercise to incorporate into your workout routine. This exercise targets several muscle groups, including the glutes, hamstrings, quads, and inner thighs. In this article, we will discuss the benefits of side to side lunges and how to perform them correctly.
Benefits of Side To Side Lunges

Side to side lunges have several benefits, including:
- Strengthening the glutes and hamstrings
- Improving hip mobility
- Toning the inner thighs
- Stabilizing the knees
- Improving balance and coordination
- Burning calories and aiding in weight loss
Whether you are an athlete, a fitness enthusiast, or simply looking to improve your overall health and well-being, incorporating side to side lunges into your workout routine can be highly beneficial.
How To Perform Side To Side Lunges

Here is a step-by-step guide on how to perform side to side lunges correctly:
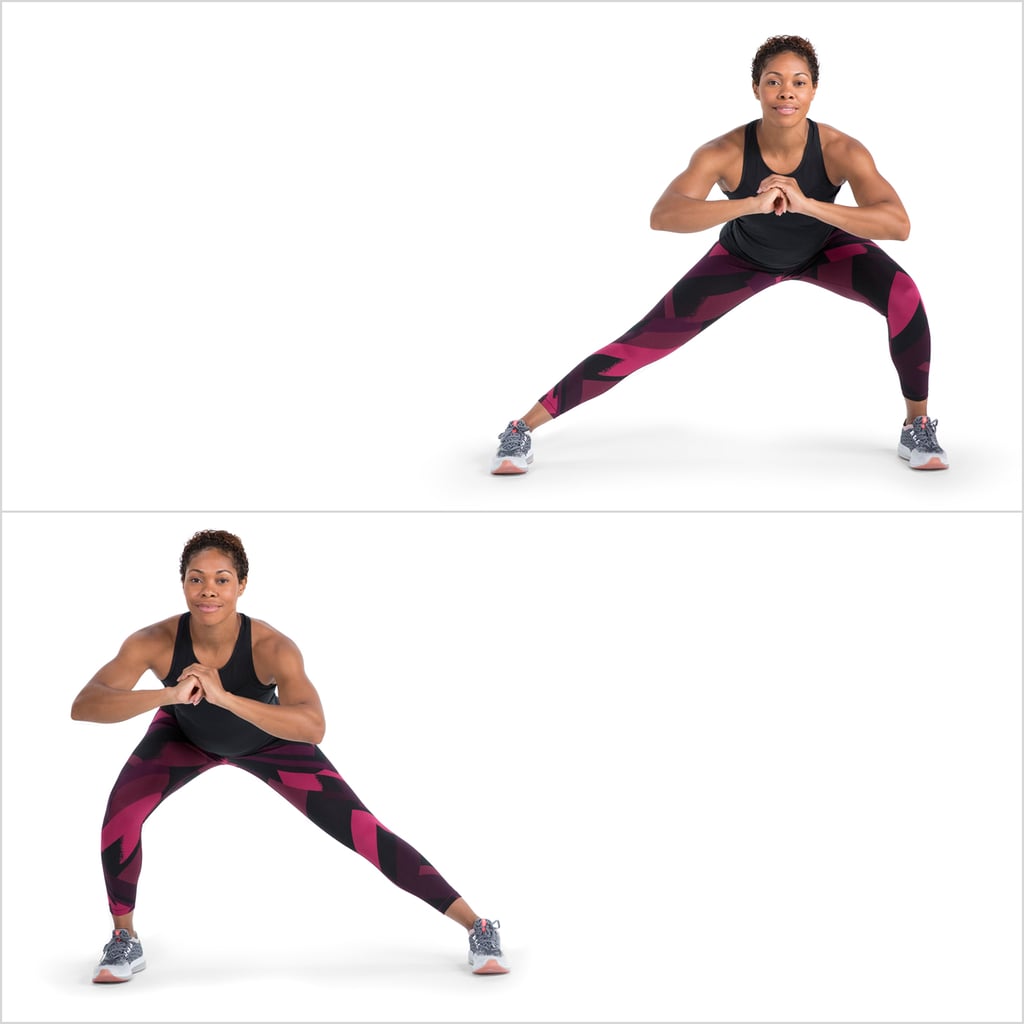
- Stand with your feet hip-width apart and your arms at your sides.
- Take a big step to your left with your left foot, keeping your right foot planted.
- Bend your left knee and push your hips back as you lower your body into a lunge position.
- Keep your left knee over your left foot and your right leg straight.
- Push through your left foot to return to the starting position.
- Repeat on the other side by stepping to your right with your right foot and bending your right knee.
- Continue alternating sides for the desired number of repetitions.
Make sure to keep your back straight, your core engaged, and your weight on your heels throughout the exercise. Avoid letting your knees collapse inward, and make sure to keep them in line with your toes.
Variations of Side To Side Lunges
Here are some variations of side to side lunges that you can try:
- Add weights: Hold dumbbells or a kettlebell in front of your chest to increase resistance and intensity.
- Incorporate a jump: Jump from side to side instead of stepping, increasing the impact and intensity of the exercise.
- Curtsy lunge: Cross your trailing leg behind your leading leg as you lunge to the side, targeting the glutes and inner thighs even more.
- Side lunge with a twist: Twist your torso towards your leading leg as you lunge to the side, engaging your obliques and core.
Conclusion
Side to side lunges are a highly effective exercise that can help you strengthen multiple muscle groups, improve mobility, and enhance your overall fitness. With proper form and technique, this exercise can be a great addition to your workout routine. Try incorporating some of the variations mentioned above to keep things interesting and challenging.
Related video of Side To Side Lunges: A Comprehensive Guide

Are you looking for a new bicep exercise to add to your routine? Look no further than the cross body bicep curl. This exercise targets the bicep muscles and can help improve overall arm strength and definition. In this guide, we will cover everything you need to know about the cross body bicep curl, including proper form, variations, and tips for maximizing your results.
What is the Cross Body Bicep Curl?

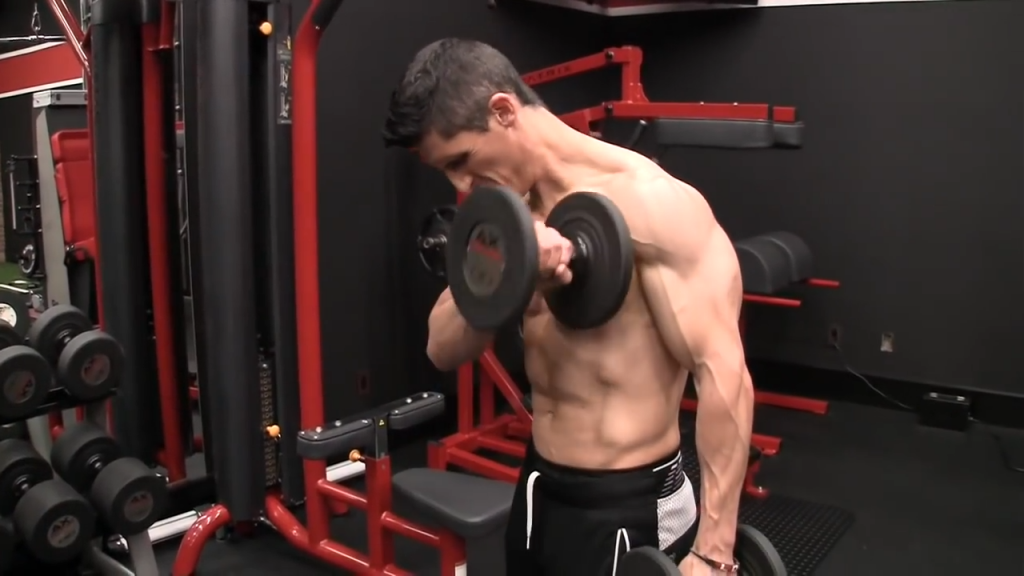
The cross body bicep curl is a variation of the traditional bicep curl that targets the bicep muscles from a different angle. Instead of curling the weight straight up, you bring the weight across your body towards the opposite shoulder. This change in direction allows you to target the bicep muscles in a unique way, which can help improve overall strength and definition.
How to Perform the Cross Body Bicep Curl
To perform the cross body bicep curl, follow these steps:
- Stand with your feet shoulder-width apart and hold a dumbbell in each hand.
- Keep your elbows close to your body and your palms facing up.
- Curl the weight up towards your opposite shoulder, keeping your elbow stationary.
- Pause at the top of the movement and then slowly lower the weight back down to the starting position.
- Repeat for the desired number of reps and then switch sides.
Remember to keep your core engaged and avoid using momentum to lift the weight. Focus on using your bicep muscles to lift the weight and control the movement throughout the exercise.
Variations of the Cross Body Bicep Curl

There are several variations of the cross body bicep curl that you can try to keep your workouts challenging and prevent boredom. Here are a few to consider:
- Single Arm Cross Body Bicep Curl: Perform the exercise with one arm at a time to increase the intensity and focus on each bicep muscle individually.
- Seated Cross Body Bicep Curl: Sit down on a bench or chair to isolate the bicep muscles and remove the possibility of using momentum to lift the weight.
- Cable Cross Body Bicep Curl: Use a cable machine instead of dumbbells to provide constant resistance throughout the movement.
Tips for Maximizing Your Results

Here are a few tips to keep in mind when performing the cross body bicep curl:
- Start with a lighter weight and focus on perfecting your form before increasing the weight.
- Keep your elbows close to your body throughout the movement to maximize bicep activation.
- Use a slow and controlled movement to avoid using momentum to lift the weight.
- Vary your grip width to target different parts of the bicep muscle.
- Incorporate the cross body bicep curl into your existing workout routine for best results.
Conclusion
The cross body bicep curl is a great exercise to add to your arm workout routine. By targeting the bicep muscles from a different angle, you can improve overall strength and definition. Remember to start with a lighter weight and perfect your form before increasing the weight, and vary your grip width to target different parts of the bicep muscle. With consistent practice, you can see noticeable improvements in your arm strength and definition.
Related video of Cross Body Bicep Curl: The Ultimate Guide
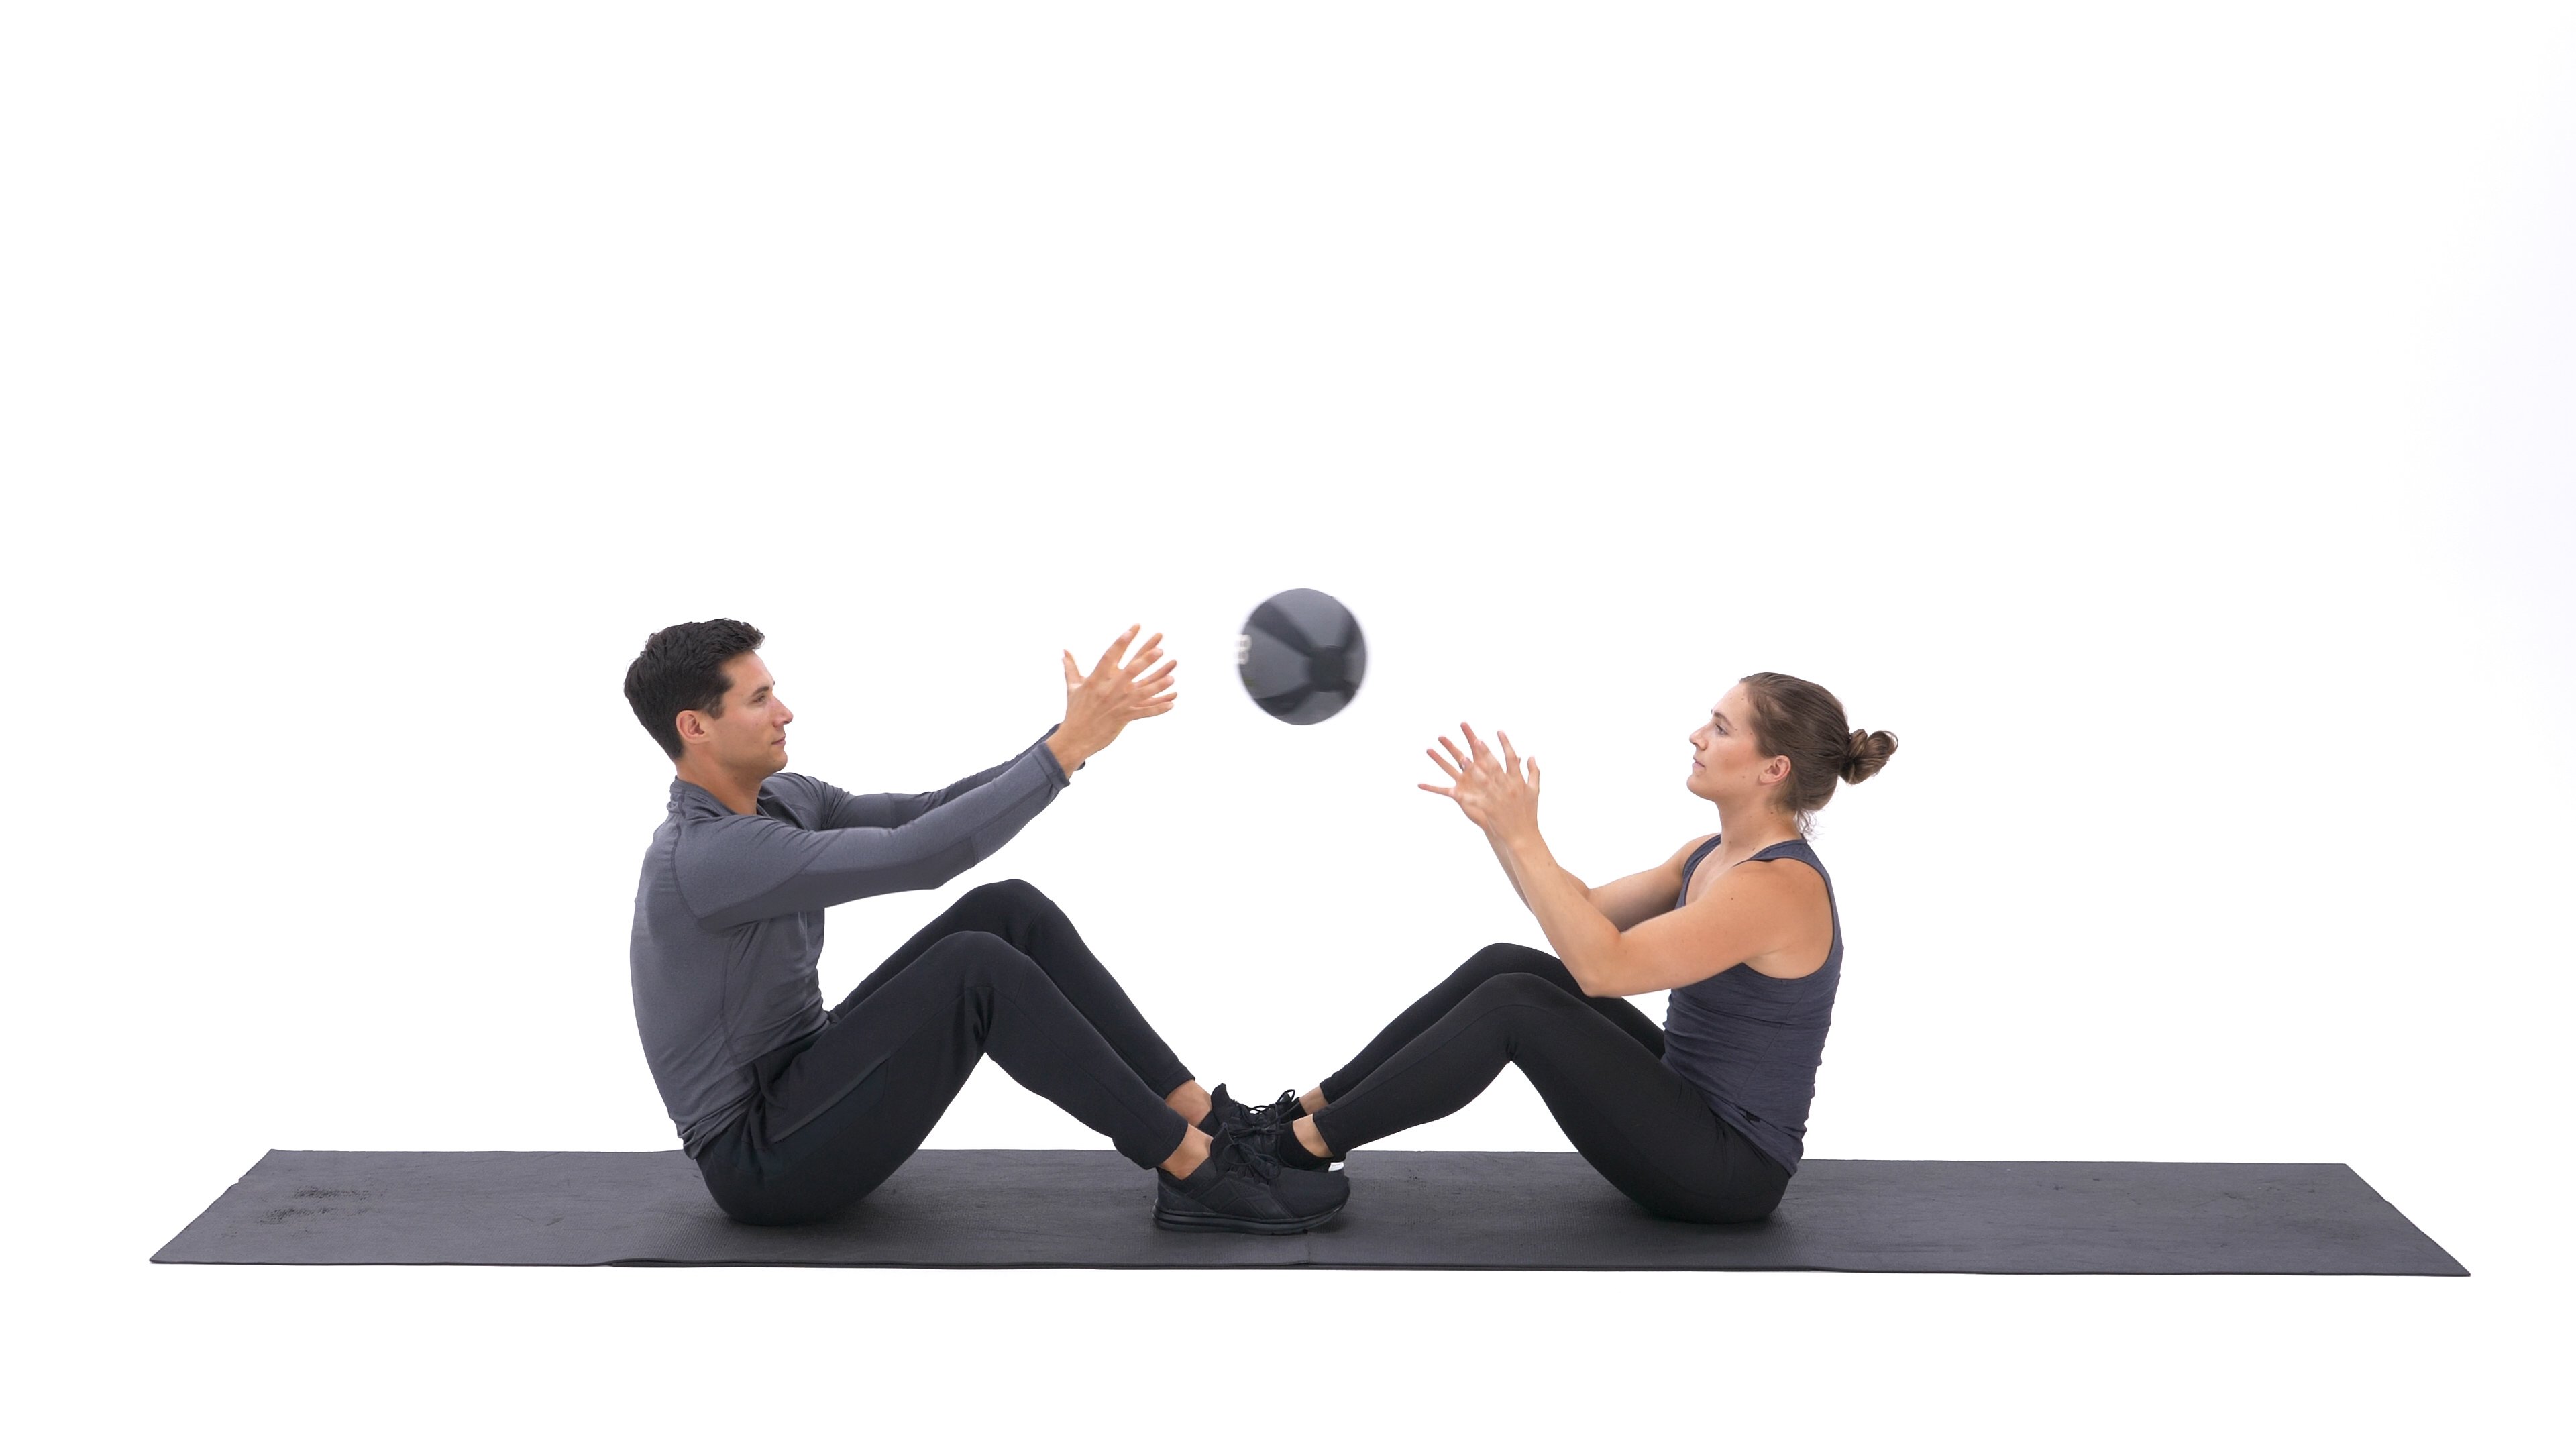
A strong core is essential for good health and fitness. It helps improve balance, stability, and posture. One of the best ways to strengthen your core is by doing the medicine ball sit-up. This exercise is not only effective but also fun to do. In this article, we will discuss the benefits of the medicine ball sit-up, how to do it, and some variations you can try.
What is a Medicine Ball Sit Up?

A medicine ball sit-up is a variation of the traditional sit-up that involves using a medicine ball. It is an excellent exercise for targeting your entire core, including your abs, obliques, and lower back muscles. The medicine ball adds extra resistance, making the exercise more challenging and effective.
Benefits of Medicine Ball Sit Up

The medicine ball sit-up has numerous benefits, including:
- Strengthening your core muscles
- Improving your balance and stability
- Increasing your overall strength
- Enhancing your athletic performance
- Reducing your risk of injury
Overall, the medicine ball sit-up is a great exercise for anyone looking to improve their core strength and overall fitness.
How to Do a Medicine Ball Sit Up

Here's how to perform a proper medicine ball sit-up:
- Start by lying on your back with your knees bent and your feet flat on the ground.
- Hold a medicine ball with both hands and extend your arms straight up towards the ceiling.
- Engage your core muscles and slowly sit up, bringing the medicine ball towards your feet.
- Pause for a moment at the top of the movement, then slowly lower yourself back down to the starting position.
- Repeat for the desired number of reps.
Make sure to keep your lower back firmly on the floor throughout the exercise. Also, exhale as you sit up and inhale as you lower yourself back down to the starting position.
Medicine Ball Sit Up Variations

Here are some variations of the medicine ball sit-up you can try:
- Medicine ball Russian twist
- Medicine ball V-up
- Medicine ball knee tuck
- Medicine ball plank with knee tuck
- Medicine ball side plank with twist
These variations will help keep your workouts interesting and challenging while still targeting your core muscles.
Conclusion
The medicine ball sit-up is an excellent exercise for targeting your entire core and improving your overall fitness. By incorporating this exercise into your workout routine, you'll be on your way to a stronger, healthier, and more balanced body.
Related video of Medicine Ball Sit Up: The Ultimate Guide to a Strong Core

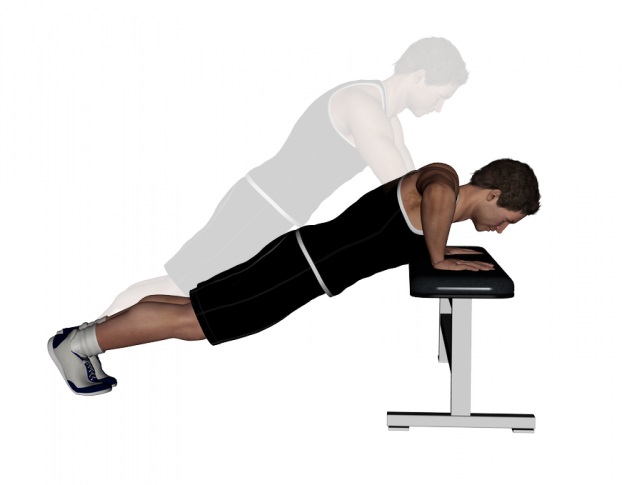
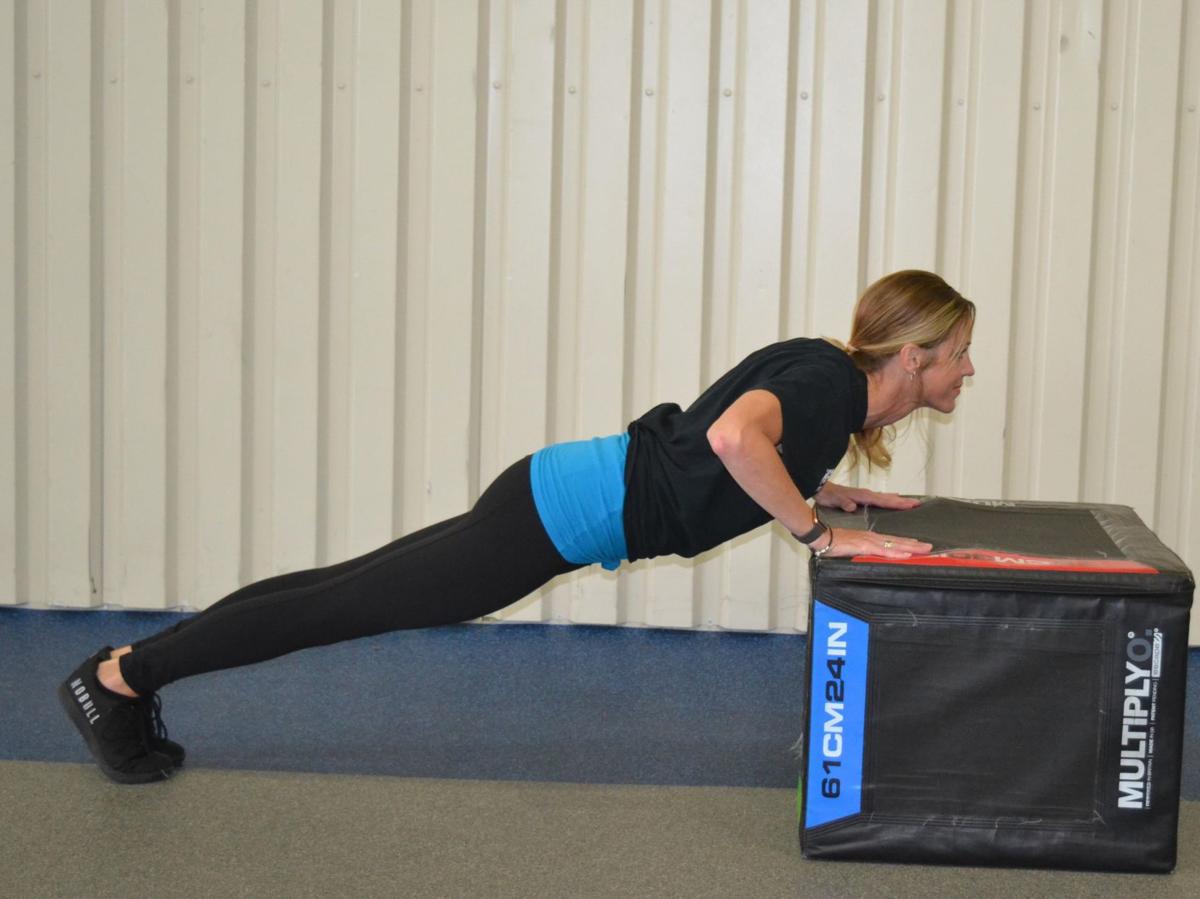
If you're looking for a challenging exercise to target your chest, shoulders, and triceps, you may want to try incline push ups. This variation of the classic push up is performed with your hands elevated on an inclined surface, such as a bench, step, or sturdy box. Incline push ups can be modified to suit different fitness levels, and they offer several benefits compared to traditional push ups. Let's take a closer look at what incline push ups are and how to do them correctly.
Benefits of Incline Push Ups
Incline push ups are a great exercise for building upper body strength and improving muscle endurance. Here are some of the benefits of including incline push ups in your workout routine:
- Increased activation of the chest muscles compared to traditional push ups
- Reduced stress on the wrists and shoulders
- Improved range of motion and flexibility in the shoulders
- Greater variety of exercises to target different muscle groups
- Increased difficulty and challenge for advanced athletes
How to Do Incline Push Ups

Here's a step-by-step guide on how to perform incline push ups:
- Find an inclined surface that is sturdy and safe to use, such as a bench or step
- Place your hands on the surface, slightly wider than shoulder-width apart
- Extend your legs behind you and come into a plank position, with your core engaged and your body in a straight line
- Lower your chest towards the surface, keeping your elbows close to your body and your shoulders down and back
- Press up through your hands and return to the starting position
- Repeat for the desired number of repetitions or time
Remember to breathe deeply and maintain proper form throughout the exercise. If you're new to incline push ups, start with a higher incline and gradually decrease the angle as you become stronger.
Variations of Incline Push Ups
Once you've mastered the basic incline push up, you can try these variations to challenge your muscles and add variety to your workouts:
- Decline push ups: Perform push ups with your feet elevated on a surface higher than your hands
- Single-arm incline push ups: Perform push ups with one hand on the surface and one hand on the ground, alternating hands each repetition
- Close-grip incline push ups: Perform push ups with your hands close together on the surface, targeting your triceps and inner chest muscles
- Explosive incline push ups: Perform push ups with enough force to lift your hands off the surface and clap in mid-air, increasing power and speed
Conclusion
Incline push ups are a versatile and effective exercise for building upper body strength and endurance. Whether you're a beginner or an advanced athlete, incline push ups can be modified to suit your fitness level and goals. By incorporating incline push ups into your workout routine, you can target your chest, shoulders, and triceps from different angles and maximize your results.
Related video of What Are Incline Push Ups
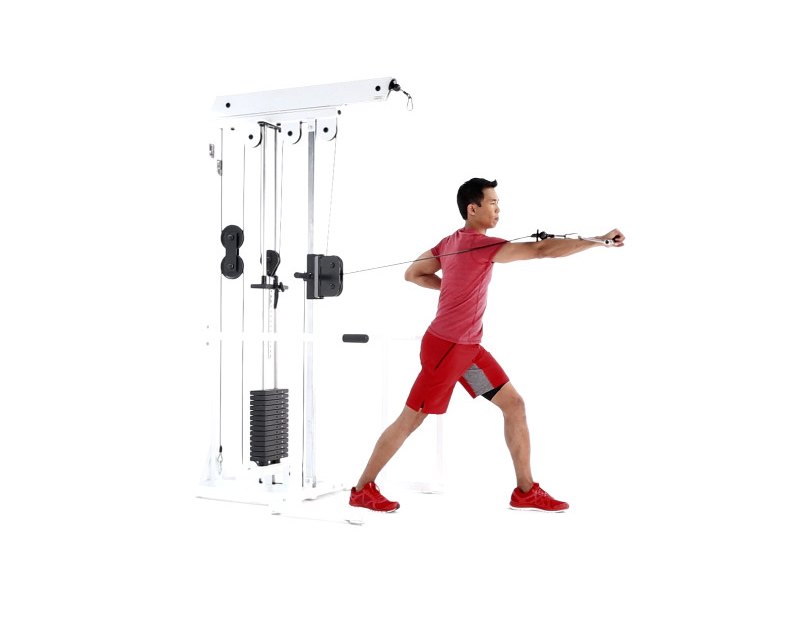
Are you looking to spice up your chest workout routine? Look no further than the single cable chest workout. This exercise is a great way to target your chest muscles and achieve a more toned and defined look.
What is the Single Cable Chest Workout?
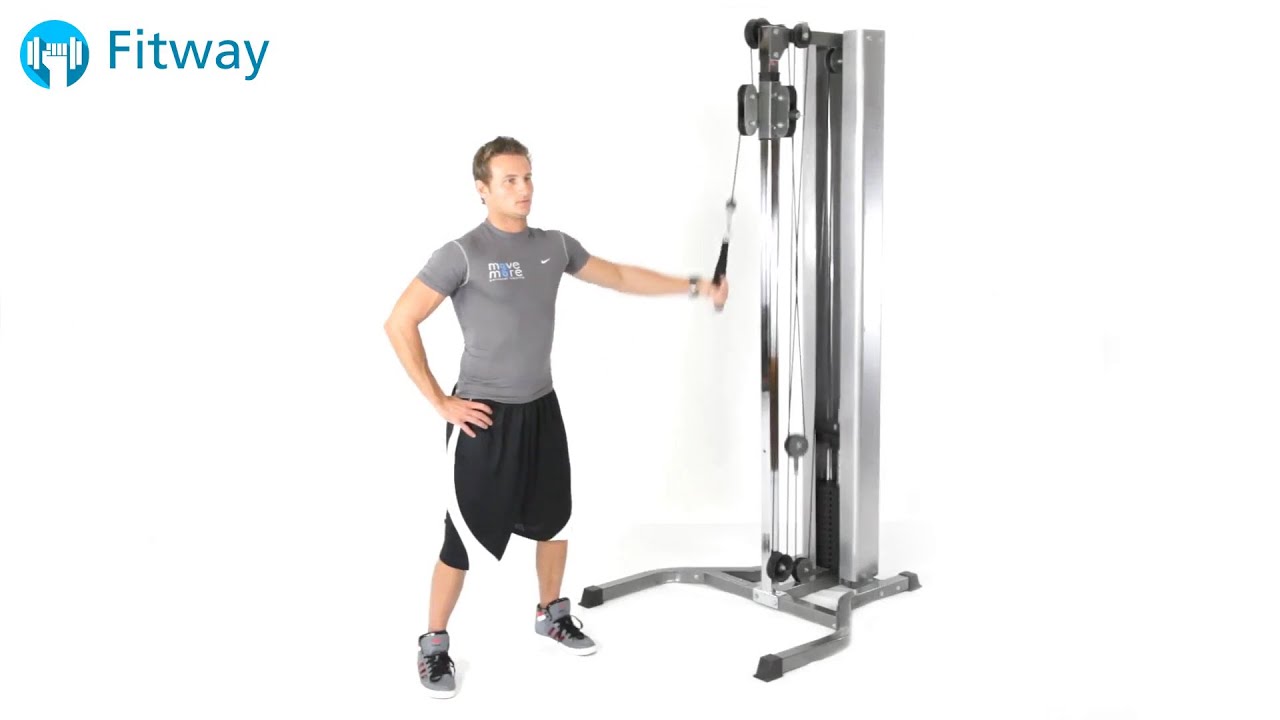
The single cable chest workout is a strength training exercise that involves using a cable machine to work your chest muscles. This exercise is performed by standing in front of the cable machine and pulling the cable towards your body with one arm, while keeping your other arm at your side. This movement targets your chest muscles and helps to build strength and definition in this area.
Benefits of the Single Cable Chest Workout
There are several benefits to incorporating the single cable chest workout into your fitness routine. Firstly, this exercise allows you to target your chest muscles in a unique way, helping to build strength and definition in this area. Additionally, the single cable chest workout can help to improve your overall upper body strength, which can be beneficial for other exercises and activities. Finally, this exercise is a great way to mix up your workout routine and keep things interesting.
How to Perform the Single Cable Chest Workout

If you're ready to give the single cable chest workout a try, follow these steps:
- Stand in front of a cable machine with the handle set at chest height.
- Grab the handle with one hand and stand with your feet shoulder-width apart.
- Keeping your other arm at your side, pull the handle towards your body.
- Hold the contraction for a few seconds, then slowly release the cable back to the starting position.
- Repeat for several repetitions on one side, then switch to the other side.
It's important to maintain proper form throughout the exercise to avoid injury and maximize results. Keep your back straight and engage your core muscles throughout the movement. Additionally, be sure to breathe deeply and exhale as you pull the cable towards your body.
Adding Variations to Your Single Cable Chest Workout

To add even more variety to your single cable chest workout, try incorporating different variations of the exercise. For example, you can try performing the exercise while standing on one leg or while holding a weight in your free hand. Additionally, you can adjust the height of the cable machine or the angle of your body to target different areas of your chest muscles.
Incorporating the Single Cable Chest Workout into Your Fitness Routine

If you're looking to incorporate the single cable chest workout into your fitness routine, try performing the exercise 2-3 times per week. Start with a low weight and gradually increase as you become more comfortable with the movement. Additionally, be sure to warm up before beginning your workout and cool down afterwards to prevent injury.
Conclusion
The single cable chest workout is a great way to target your chest muscles and add variety to your fitness routine. Whether you're a beginner or an experienced fitness enthusiast, this exercise is a great way to build strength and definition in your chest muscles. So give it a try and see the results for yourself!
Related video of Single Cable Chest Workout
If you are looking for a way to strengthen your core, Side to Side Chops is an excellent exercise to add to your routine. This exercise is great for building strength in your oblique muscles, which are located on the sides of your abdomen. In this article, we will cover everything you need to know about Side to Side Chops, including how to do them, their benefits, and variations you can try.
What are Side to Side Chops?

Side to Side Chops is an exercise that involves twisting your torso from side to side while holding a weight or resistance band. As you twist, you engage your oblique muscles, which are responsible for rotating your torso and supporting your spine. This exercise can be done standing or kneeling, and it can be modified to suit your fitness level.
How to Do Side to Side Chops

To do Side to Side Chops, follow these steps:
- Stand with your feet shoulder-width apart, or kneel on the ground with one knee down and the other foot planted firmly on the ground.
- Hold a weight or resistance band in both hands. Keep your arms straight and your hands shoulder-width apart.
- Twist your torso to the right, bringing the weight or band down to your right hip.
- Return to the starting position and then twist your torso to the left, bringing the weight or band down to your left hip.
- Repeat for the desired number of reps.
Remember to engage your core muscles throughout the exercise and to keep your back straight. You should also exhale as you twist and inhale as you return to the starting position.
Benefits of Side to Side Chops

Side to Side Chops offers a range of benefits, including:
- Strengthening your oblique muscles, which can improve your posture and reduce your risk of back pain.
- Improving your balance and stability by engaging your core muscles.
- Burning calories and aiding in weight loss.
- Increasing your range of motion in your spine and hips.
- Developing greater rotational power, which can benefit athletes in sports such as golf, tennis, and baseball.
Modifications and Variations

If you are new to Side to Side Chops, you may want to start with a lighter weight or resistance band and fewer reps. You can gradually increase the weight and reps as you become stronger.
You can also modify Side to Side Chops by:
- Using a medicine ball or kettlebell instead of a weight or resistance band.
- Adding a squat or lunge to the exercise to work your lower body as well.
- Performing the exercise on an unstable surface, such as a balance board, to challenge your core muscles even more.
Conclusion
Side to Side Chops is a great exercise for building strength and stability in your core muscles. By incorporating this exercise into your routine, you can improve your posture, reduce your risk of back pain, and develop greater rotational power. Remember to start with a weight or resistance band that is appropriate for your fitness level, and to gradually increase the weight and reps as you become stronger. Have fun and enjoy the benefits of this effective exercise!
Related video of Side To Side Chops: A Comprehensive Guide to Work Out Your Core

Do you often feel tightness in your thighs after a long day of sitting or standing? If so, you're not alone. Many people experience discomfort in their lower body due to a sedentary lifestyle or lack of stretching. Fortunately, there's an easy solution to this problem: the lying side quad stretch. In this article, we'll discuss what this stretch is, how to perform it correctly, and its benefits for your overall health.
What Is the Lying Side Quad Stretch?
The lying side quad stretch is a simple exercise that targets the quadriceps muscles in your thighs. This stretch involves lying on your side and bending your leg behind you, which helps to lengthen and release tension in your quads. It's a great way to warm up before a workout or to stretch out after a long day of sitting or standing.
How to Perform the Lying Side Quad Stretch

To perform the lying side quad stretch, follow these steps:
- Lie down on one side with your legs straight out.
- Bend your top leg at the knee and bring your heel towards your buttocks.
- Use your hand to grasp your ankle or foot, pulling it closer to your buttocks.
- Hold the stretch for 15 to 30 seconds, feeling the stretch in your quadriceps muscle.
- Release the stretch and switch sides, repeating the same steps with your other leg.
It's important to keep your hips stacked on top of each other during this stretch to avoid twisting your spine. You should also avoid pulling your foot too hard or too far to prevent injury.
Benefits of the Lying Side Quad Stretch

The lying side quad stretch offers several benefits for your overall health and well-being. Here are some of the most notable advantages:
- Reduces tightness and discomfort in your quadriceps muscles.
- Improves flexibility and range of motion in your hips and thighs.
- Prevents injury by warming up your muscles before a workout.
- Relieves stress and tension in your lower body, promoting relaxation and better sleep.
- Enhances your athletic performance by increasing your mobility and agility.
Overall, the lying side quad stretch is a simple yet effective way to take care of your lower body and improve your physical and mental health.
Final Thoughts
If you're looking for a quick and easy way to relieve tightness and discomfort in your thighs, the lying side quad stretch is a great option. This stretch can be done anywhere, anytime, and requires no special equipment or expertise. Just remember to perform it correctly and listen to your body's needs. Your quadriceps muscles will thank you for it!
Related video of Lying Side Quad Stretch: A Simple Way to Relieve Tightness in Your Thighs

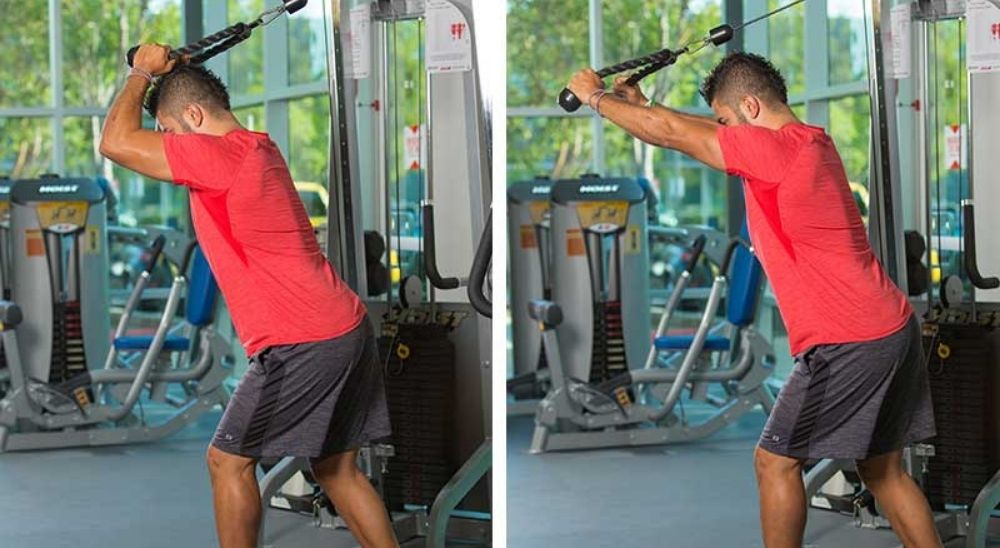
High pulls are a popular exercise that are often used by weightlifters, powerlifters, and other athletes to improve their upper-body strength and power. This exercise involves pulling a weight from the floor up to just below your chin, using a combination of your back, shoulders, and arm muscles.
The Muscles Worked during High Pulls

High pulls primarily work your upper back muscles, including your trapezius and rhomboids. These muscles are responsible for pulling your shoulder blades back and down, which is a key movement during the high pull exercise.
In addition to your upper back muscles, high pulls also work your shoulders, particularly your deltoids. The deltoids are responsible for lifting your arms out to the side and up overhead, which is another key movement during high pulls.
Your biceps, forearms, and grip muscles also get a good workout during high pulls, as they are responsible for holding onto and pulling the weight up towards your chin.
The Benefits of High Pulls

High pulls offer a number of benefits, particularly for athletes and weightlifters. Here are some of the key benefits of this exercise:
- Improved upper-body strength: High pulls are an excellent exercise for building upper-body strength, particularly in your back and shoulders.
- Increased power: High pulls are a power exercise, meaning they are designed to improve explosive strength and power. This can be helpful for athletes who need to generate a lot of force quickly, such as sprinters or football players.
- Better posture: By working your upper back muscles, high pulls can help improve your posture and reduce the risk of shoulder and neck pain.
- Increased grip strength: High pulls require a strong grip in order to hold onto the weight, so this exercise can be helpful for improving grip strength.
How to Perform High Pulls

If you want to try high pulls for yourself, here's how to perform the exercise:
- Stand with your feet shoulder-width apart and your toes pointing forward.
- Hold a barbell in front of your thighs with an overhand grip.
- Bend your knees slightly and hinge forward at the hips, keeping your back straight.
- Pull the barbell up towards your chin, keeping your elbows high and your shoulders back and down.
- Lower the barbell back down to the starting position and repeat for the desired number of reps.
It's important to use proper form when performing high pulls, as this exercise can be quite challenging. Be sure to engage your back and shoulder muscles, and avoid using your arms to lift the weight.
Conclusion
High pulls are a great exercise for building upper-body strength, power, and grip strength. By targeting your upper back, shoulders, and arm muscles, this exercise can help you improve your posture, reduce the risk of injuries, and enhance your athletic performance.