If you're looking for an alternative to the traditional dumbbell shoulder press, you're in luck! There are plenty of other exercises that can give you the same benefits without putting as much strain on your shoulders. In this article, we'll explore 15 effective dumbbell shoulder press alternatives that you can add to your workout routine.
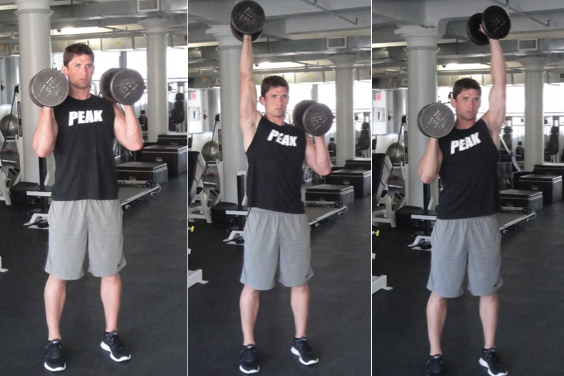
1. Arnold Press

The Arnold press is a great alternative to the dumbbell shoulder press because it targets all three heads of the shoulder muscle. To perform this exercise, start by holding a dumbbell in each hand at shoulder height. Then, rotate your palms so that your palms are facing your body. Press the dumbbells up and out as you rotate your palms so that they are facing away from your body. Lower the dumbbells back down to shoulder height and repeat.
2. Seated Dumbbell Lateral Raise

The seated dumbbell lateral raise is another great alternative to the dumbbell shoulder press. This exercise targets the middle part of your shoulder muscles. To perform this exercise, sit on a bench with your feet flat on the ground. Hold a dumbbell in each hand and raise them out to the side until they are level with your shoulders. Lower the dumbbells back down to your sides and repeat.
3. Standing Dumbbell Front Raise
The standing dumbbell front raise is a great exercise for targeting the front part of your shoulder muscles. To perform this exercise, stand with your feet shoulder-width apart and hold a dumbbell in each hand. Raise the dumbbells up in front of your body until they are level with your shoulders. Lower the dumbbells back down to your sides and repeat.
4. Bent Over Dumbbell Rear Delt Raise

The bent over dumbbell rear delt raise is a great exercise for targeting the back part of your shoulder muscles. To perform this exercise, bend over at the waist and hold a dumbbell in each hand. Raise the dumbbells up and out to the side until they are level with your shoulders. Lower the dumbbells back down to your sides and repeat.
5. Cable Lateral Raise

The cable lateral raise is a great alternative to the dumbbell shoulder press because it provides constant tension throughout the exercise. To perform this exercise, stand facing a cable machine with the handle at shoulder height. Hold the handle with one hand and raise it out to the side until it is level with your shoulder. Lower the handle back down to your side and repeat. Switch sides and repeat.
6. Cable Front Raise

The cable front raise is another great exercise for targeting the front part of your shoulder muscles. To perform this exercise, stand facing a cable machine with the handle at waist height. Hold the handle with one hand and raise it up in front of your body until it is level with your shoulders. Lower the handle back down to your side and repeat. Switch sides and repeat.
7. Standing Dumbbell Rear Delt Raise

The standing dumbbell rear delt raise is another great exercise for targeting the back part of your shoulder muscles. To perform this exercise, stand with your feet shoulder-width apart and hold a dumbbell in each hand. Raise the dumbbells out to the side until they are level with your shoulders. Lower the dumbbells back down to your sides and repeat.
8. Cable Face Pulls

Cable face pulls are a great exercise for targeting the upper back and shoulder muscles. To perform this exercise, stand facing a cable machine with the handle at chest height. Hold the handle with both hands and pull it towards your face, keeping your elbows high. Lower the handle back down to chest height and repeat.
9. Dumbbell Upright Row

The dumbbell upright row is a great exercise for targeting the upper back and shoulder muscles. To perform this exercise, stand with your feet shoulder-width apart and hold a dumbbell in each hand. Pull the dumbbells up towards your chin, keeping your elbows high. Lower the dumbbells back down to your sides and repeat.
10. Seated Bent Over Rear Delt Raise

The seated bent over rear delt raise is another great exercise for targeting the back part of your shoulder muscles. To perform this exercise, sit on a bench with your feet flat on the ground. Bend over at the waist and hold a dumbbell in each hand. Raise the dumbbells out to the side until they are level with your shoulders. Lower the dumbbells back down to your sides and repeat.
11. Dumbbell Push Press

The dumbbell push press is a great exercise for targeting the front part of your shoulder muscles. To perform this exercise, hold a dumbbell in each hand at shoulder height. Dip down slightly and then explosively push the dumbbells up over your head. Lower the dumbbells back down to shoulder height and repeat.
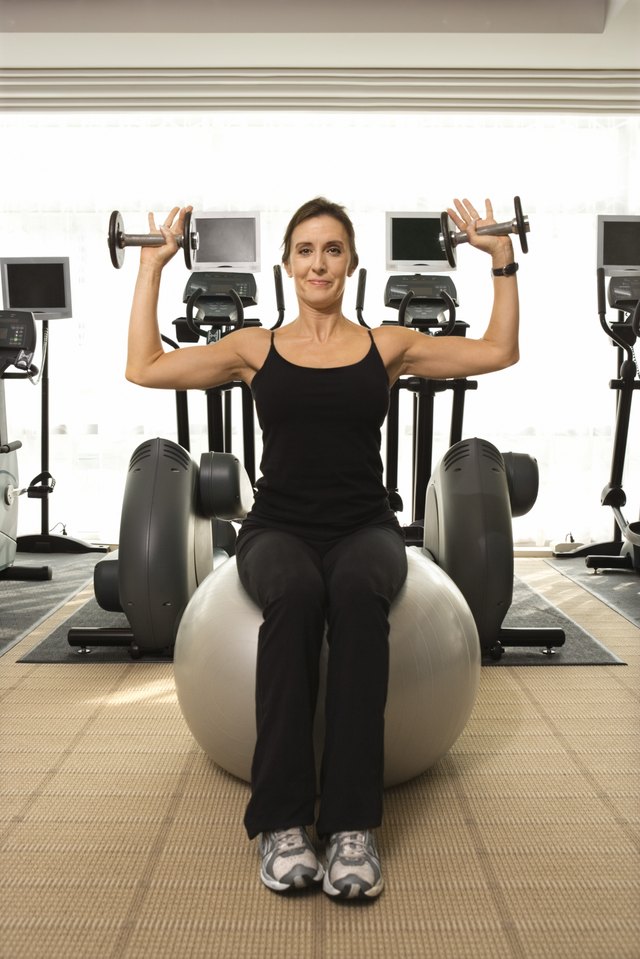
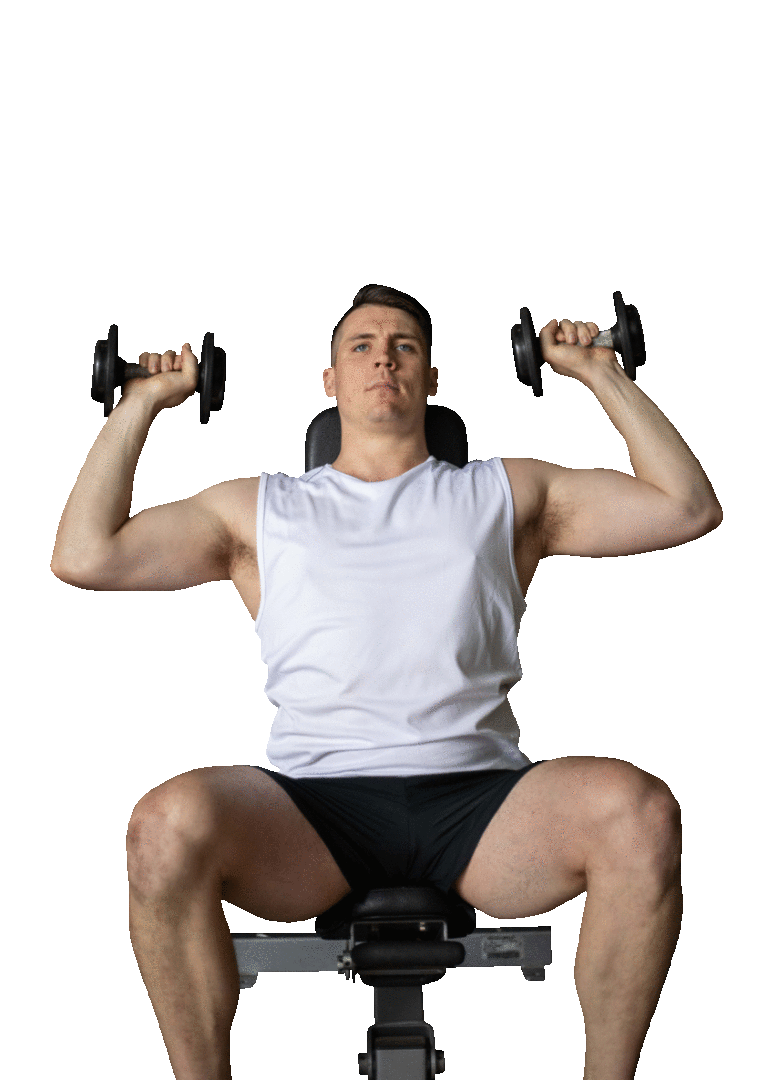
12. Seated Dumbbell Shoulder Press

The seated dumbbell shoulder press is a variation of the traditional dumbbell shoulder press that can be less taxing on your shoulders. To perform this exercise, sit on a bench with your feet flat on the ground. Hold a dumbbell in each hand at shoulder height. Press the dumbbells up over your head and then lower them back down to shoulder height.
13. Seated Cable Shoulder Press
The seated cable shoulder press is another great alternative to the dumbbell shoulder press. This exercise provides constant tension throughout the movement. To perform this exercise, sit on a bench facing a cable machine with the handle at shoulder height. Hold the handle with both hands and press it up over your head. Lower the handle back down to shoulder height and repeat.
14. Kettlebell Overhead Press
The kettlebell overhead press is a great exercise for targeting the front part of your shoulder muscles. To perform this exercise, hold a kettlebell in each hand at shoulder height. Dip down slightly and then explosively push the kettlebells up over your head. Lower the kettlebells back down to shoulder height and repeat.
15. Barbell Overhead Press
The barbell overhead press is a great exercise for targeting the front part of your shoulder muscles. To perform this exercise, stand with your feet shoulder-width apart and hold a barbell at shoulder height. Dip down slightly and then explosively push the barbell up over your head. Lower the barbell back down to shoulder height and repeat.
Conclusion
There are plenty of effective dumbbell shoulder press alternatives that you can add to your workout routine. By incorporating these exercises into your routine, you can target all parts of your shoulder muscles while reducing the strain on your shoulders. Experiment with different exercises to find what works best for you.
Related video of Dumbbell Shoulder Press Alternative: 15 Effective Exercises
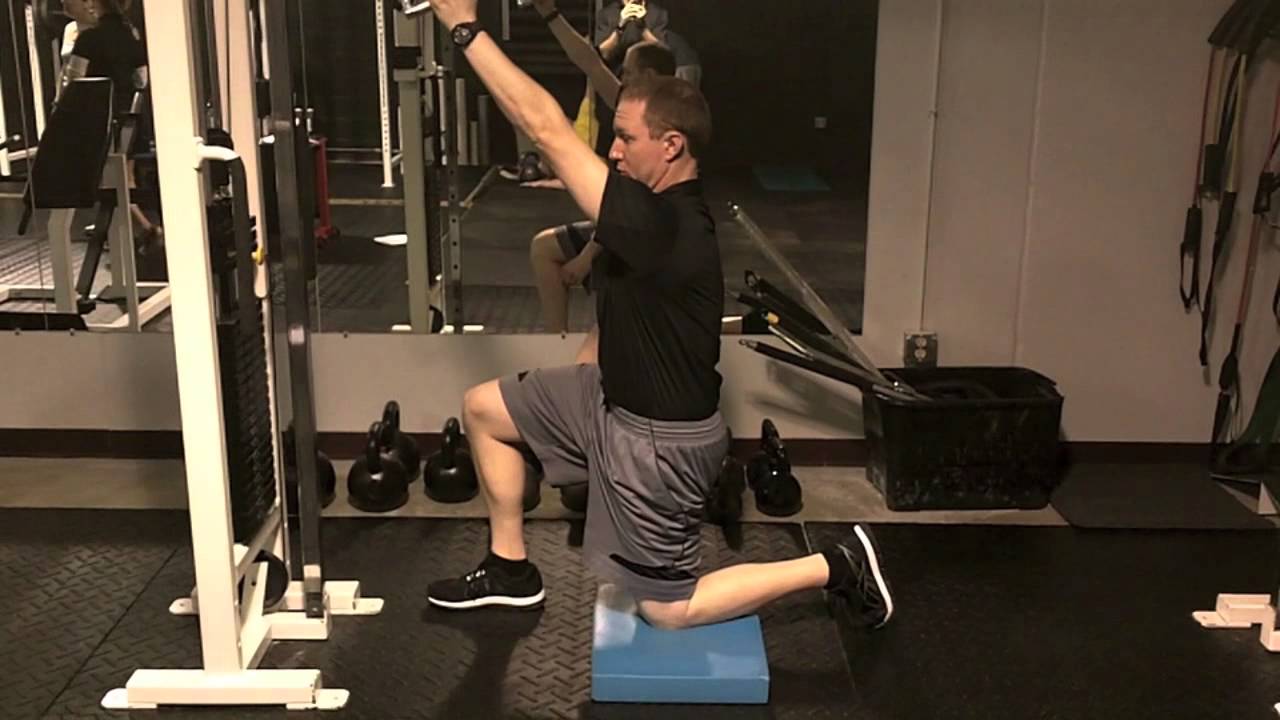
If you're looking for a way to build a stronger back, the half kneeling single arm lat pulldown is a great exercise to add to your routine. This exercise targets the latissimus dorsi, or "lats," which are the large muscles that run down the sides of your back. By doing this exercise regularly, you can improve your posture, reduce your risk of back pain, and increase your overall strength and fitness.
What You'll Need

To do the half kneeling single arm lat pulldown, you'll need access to a cable machine or resistance band. You'll also need a bench or mat to kneel on, and a handle or attachment for the cable machine or resistance band. Make sure you choose a weight or resistance level that challenges you without causing you to sacrifice your form.
How to Do the Half Kneeling Single Arm Lat Pulldown

To perform the half kneeling single arm lat pulldown:
- Kneel on your right knee with your left foot flat on the ground in front of you. Your left knee should be bent at a 90-degree angle.
- Grab the handle or attachment with your left hand and extend your arm up towards the ceiling.
- Engage your core and pull the handle down towards your left hip, keeping your elbow close to your body.
- Pause for a moment at the bottom of the movement, then slowly release back up to the starting position.
- Repeat for 10-12 repetitions, then switch sides and repeat with your right arm.
Remember to keep your back straight and your shoulders relaxed throughout the exercise. Avoid using momentum to pull the weight down, and focus on using your back muscles to perform the movement.
Variations of the Half Kneeling Single Arm Lat Pulldown

There are several variations of the half kneeling single arm lat pulldown that you can try once you've mastered the basic movement:
- Single arm cable row: Instead of pulling the weight down towards your hip, pull it towards your ribcage, keeping your elbow close to your body.
- Seated cable row: Sit on a bench or chair and perform the same movement with both arms at the same time.
- Resistance band lat pulldown: Use a resistance band instead of a cable machine to perform the exercise.
Adding these variations to your routine can help keep your workouts challenging and prevent boredom.
Tips for Success

Here are some tips to keep in mind as you perform the half kneeling single arm lat pulldown:
- Start with a light weight or resistance level and focus on maintaining proper form.
- Breathe in as you pull the weight down, and exhale as you release back up.
- Don't forget to stretch your back muscles before and after your workout to prevent injury and improve flexibility.
- Include this exercise as part of a comprehensive strength training program that targets all of your major muscle groups.
Conclusion
The half kneeling single arm lat pulldown is a great exercise for anyone looking to build a stronger back and improve their overall fitness. By incorporating this movement into your routine and following these tips for success, you can enjoy the benefits of better posture, reduced back pain, and increased strength and endurance.
Related video of Half Kneeling Single Arm Lat Pulldown: A Guide to Strengthening Your Back
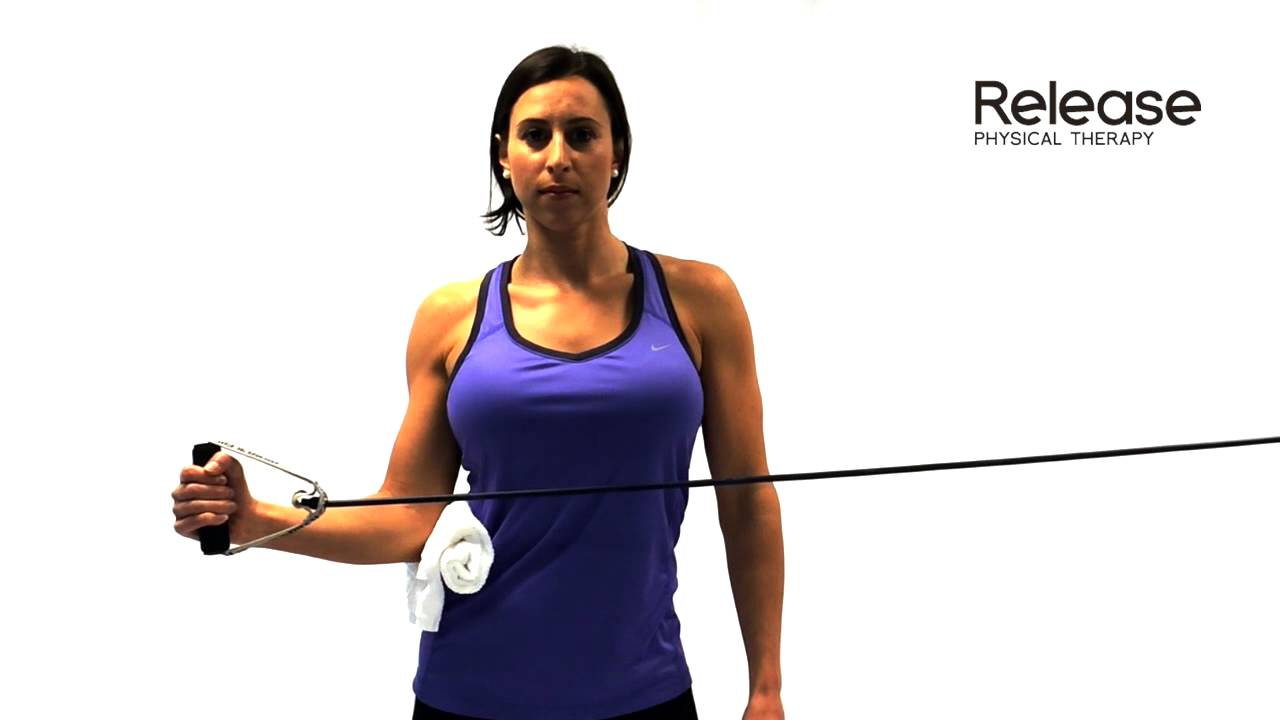
Shoulder external rotation band is a simple yet effective exercise that can help you improve your shoulder mobility. It is a resistance band exercise that targets the external rotators of your shoulder muscles. The exercise involves moving your arm away from your body, which helps to strengthen and stretch the muscles that are responsible for external rotation. In this article, we will discuss the benefits of shoulder external rotation band and how to perform it correctly.
Benefits of Shoulder External Rotation Band

The shoulder external rotation band has numerous benefits for your shoulder health. Some of the benefits include:
- Improved shoulder mobility
- Reduced risk of shoulder injuries
- Stronger and more stable shoulder joints
- Improved posture
Shoulder external rotation band is particularly beneficial for people who engage in activities that require overhead arm movements such as weightlifting, swimming, and baseball. These activities can put a lot of stress on the shoulder joint and muscles, leading to injuries and pain. By incorporating shoulder external rotation band exercise into your routine, you can strengthen and stretch the muscles that support your shoulder joint, reducing the risk of injuries and improving your performance.
How to Perform Shoulder External Rotation Band Exercise

Performing shoulder external rotation band exercise is simple and requires only a resistance band. Here are the steps to perform the exercise:
- Attach one end of the resistance band to a fixed object such as a door handle or a post.
- Hold the other end of the resistance band with the hand of the arm you want to exercise.
- Stand perpendicular to the fixed object with your arm extended in front of you and your elbow bent at 90 degrees.
- Rotate your arm away from your body while keeping your elbow close to your side.
- Return to the starting position slowly and repeat for the desired number of reps.
It is essential to maintain proper form while performing shoulder external rotation band exercise. Keep your elbow close to your side and avoid swinging your arm. Start with light resistance and gradually increase the resistance as you get stronger.
When to Perform Shoulder External Rotation Band Exercise
You can perform shoulder external rotation band exercise as part of your warm-up or cool-down routine. It is also beneficial to perform it on days when you engage in activities that require overhead arm movements. For example, if you are a weightlifter, you can perform shoulder external rotation band exercise before and after your workout to reduce the risk of injuries and improve your performance.
Other Exercises for Shoulder Health

Shoulder external rotation band exercise is just one of many exercises that can improve your shoulder health. Here are some other exercises you can incorporate into your routine:
- Shoulder circles
- Shoulder blade squeeze
- Shoulder shrugs
- Internal rotation stretch
- External rotation stretch
It is essential to consult a healthcare professional before starting any exercise program, especially if you have a pre-existing medical condition or injury.
Conclusion
Shoulder external rotation band exercise is a simple yet effective exercise that can help you improve your shoulder mobility and reduce the risk of injuries. By incorporating it into your routine, you can strengthen and stretch the muscles that support your shoulder joint, leading to stronger and more stable shoulder joints. Remember to maintain proper form, start with light resistance, and gradually increase the resistance as you get stronger. Consult a healthcare professional before starting any exercise program.
Related video of Shoulder External Rotation Band: Improve Your Shoulder Mobility

Introduction
Are you looking for an effective way to tone your shoulders and upper arms? If yes, then lateral raise to front raise is the perfect exercise for you. It is a compound exercise that targets multiple muscles at once, including the deltoids, trapezius, and biceps. In this article, we will discuss everything you need to know about lateral raise to front raise, including its benefits, proper form, and variations.Benefits of Lateral Raise To Front Raise
Lateral raise to front raise is an excellent exercise for strengthening and toning your shoulders and upper arms. Here are some of the benefits of this exercise:- It targets multiple muscles at once, making it a time-efficient exercise.- It improves shoulder stability and mobility.- It helps to correct muscle imbalances and posture issues.- It can be done with or without weights, making it suitable for beginners and advanced trainees.Proper Form
To perform lateral raise to front raise, follow these steps:1. Stand with your feet shoulder-width apart and hold a dumbbell in each hand.2. Start with your arms at your sides, palms facing your body.3. Raise your arms out to the sides until they are parallel to the floor (lateral raise).4. Pause for a second, then rotate your arms forward until they are in front of your body (front raise).5. Lower your arms back to the starting position.Common Mistakes
Here are some common mistakes to avoid while performing lateral raise to front raise:- Using momentum to lift the weights instead of relying on your muscles.- Raising your arms too high, which can strain your shoulders.- Arching your back or leaning forward, which can lead to back pain.- Not maintaining a neutral spine position throughout the exercise.Variations
Here are some variations of lateral raise to front raise that you can try:- Seated lateral raise to front raise: Sit on a bench or chair and perform the exercise with your arms at your sides.- Cable lateral raise to front raise: Attach a cable machine to your ankles and perform the exercise with resistance.- Single-arm lateral raise to front raise: Perform the exercise with one arm at a time, alternating between sides.Conclusion
Lateral raise to front raise is a highly effective exercise for toning and strengthening your shoulders and upper arms. By following proper form and avoiding common mistakes, you can reap the benefits of this compound exercise. Try incorporating lateral raise to front raise into your workout routine and see the results for yourself!Related video of Lateral Raise To Front Raise: A Comprehensive Guide

The Rise and Fall of the Sit Up
For decades, the sit up has been a staple exercise in fitness routines. It's easy to do, requires no equipment, and promises to give you a flat stomach if you do enough of them. But as it turns out, the sit up may not be as effective as we once thought.
Recent research has shown that the sit up puts a significant amount of stress on your spine, especially your lower back. This can lead to pain and even injury over time. Plus, the sit up only works a small portion of your abdominal muscles, leaving other important muscles untouched.

The Problem With Spot Reduction
One of the biggest misconceptions about the sit up is that it can target and reduce fat in your midsection. But the truth is that you can't spot reduce fat. When you do sit ups, you're only working the muscles underneath the fat, which won't necessarily result in a flatter stomach.
Instead, you need to focus on overall fat loss through a combination of healthy eating and full-body exercises. This will help you lose fat all over your body, including your midsection.
The Better Alternatives to the Sit Up
If you're looking for a more effective way to work your abs and core, there are plenty of alternatives to the sit up. Here are a few options:
Plank

The plank is a great exercise for your abs, as well as your back and shoulders. Start in a push-up position, but instead of lowering yourself down, hold yourself up in a straight line from head to heels. Hold for as long as you can, keeping your abs engaged throughout.
Dead Bug

The dead bug exercise works your abs and obliques while also engaging your legs and arms. Lie on your back with your arms and legs up in the air, then slowly lower one arm and the opposite leg towards the ground while keeping the other arm and leg still. Alternate sides.
Mountain Climbers

Mountain climbers are a full-body exercise that also work your abs. Start in a push-up position, then bring one knee towards your chest and then switch legs quickly. It should feel like you're running in place, but in a plank position.
The Bottom Line
The sit up may have been popular in the past, but it's time to move on to more effective exercises that won't put unnecessary strain on your back. By incorporating full-body exercises that engage your core, you'll be able to strengthen your abs while also working other important muscles. So say goodbye to the sit up and hello to a stronger, healthier core!
Related video of The Sit Up Is Over: Why You Should Ditch This Exercise for Good

Building bigger and stronger chest muscles is a goal for many fitness enthusiasts. The decline chest cable fly is an exercise that can help you achieve this goal. This exercise targets the lower portion of the chest, making it a great addition to your chest workout routine. In this article, we'll discuss everything you need to know about the decline chest cable fly.
What is the Decline Chest Cable Fly?

The decline chest cable fly is an isolation exercise that primarily targets the lower portion of the chest. It involves using a cable machine with two handles attached to a low pulley. You lie down on a decline bench and grip the handles, bringing them together in front of your chest. This motion simulates a fly, hence the name.
Benefits of the Decline Chest Cable Fly

The decline chest cable fly offers several benefits, including:
- Targeting the lower portion of the chest
- Providing better range of motion than with dumbbells or barbells
- Strengthening the chest muscles
- Improving muscle definition
- Reducing the risk of injury by maintaining proper form
How to Perform the Decline Chest Cable Fly

Follow these steps to perform the decline chest cable fly:
- Adjust the cable machine to the lowest setting.
- Attach the handles to the cable machine.
- Lie down on the decline bench with your feet secured under the footpads.
- Grip the handles with your palms facing each other and your arms extended over your chest.
- Lower your arms in a wide arc until you feel a stretch in your chest muscles.
- Bring the handles together in front of your chest, squeezing your chest muscles at the top.
- Slowly lower the handles back to the starting position and repeat for the desired number of reps.
Make sure to maintain proper form throughout the exercise. Keep your elbows slightly bent and avoid locking your arms at the top of the movement. Also, avoid using momentum to lift the weight, as this can reduce the effectiveness of the exercise.
Variations of the Decline Chest Cable Fly

There are several variations of the decline chest cable fly that you can try to target different parts of your chest muscles:
- Incline chest cable fly
- Standing chest cable fly
- Single-arm chest cable fly
- Reverse grip chest cable fly
Consult with a personal trainer or fitness professional to determine which variation is best for your fitness level and goals.
Sample Decline Chest Cable Fly Workout

Here is a sample decline chest cable fly workout that you can try:
- Decline chest cable fly: 3 sets of 12 reps
- Incline dumbbell press: 3 sets of 10 reps
- Chest dips: 3 sets of 8 reps
- Cable crossover: 3 sets of 15 reps
Rest for 60-90 seconds between sets and exercises. Make sure to warm up properly before starting the workout and cool down afterwards.
Final Thoughts

The decline chest cable fly is an effective exercise for targeting the lower portion of the chest muscles. It offers several benefits, including improved muscle definition and reduced risk of injury. By incorporating this exercise into your chest workout routine, you can achieve a stronger and more defined chest. Remember to maintain proper form and consult with a fitness professional before starting any new exercise program.
Related video of Decline Chest Cable Fly: The Ultimate Guide
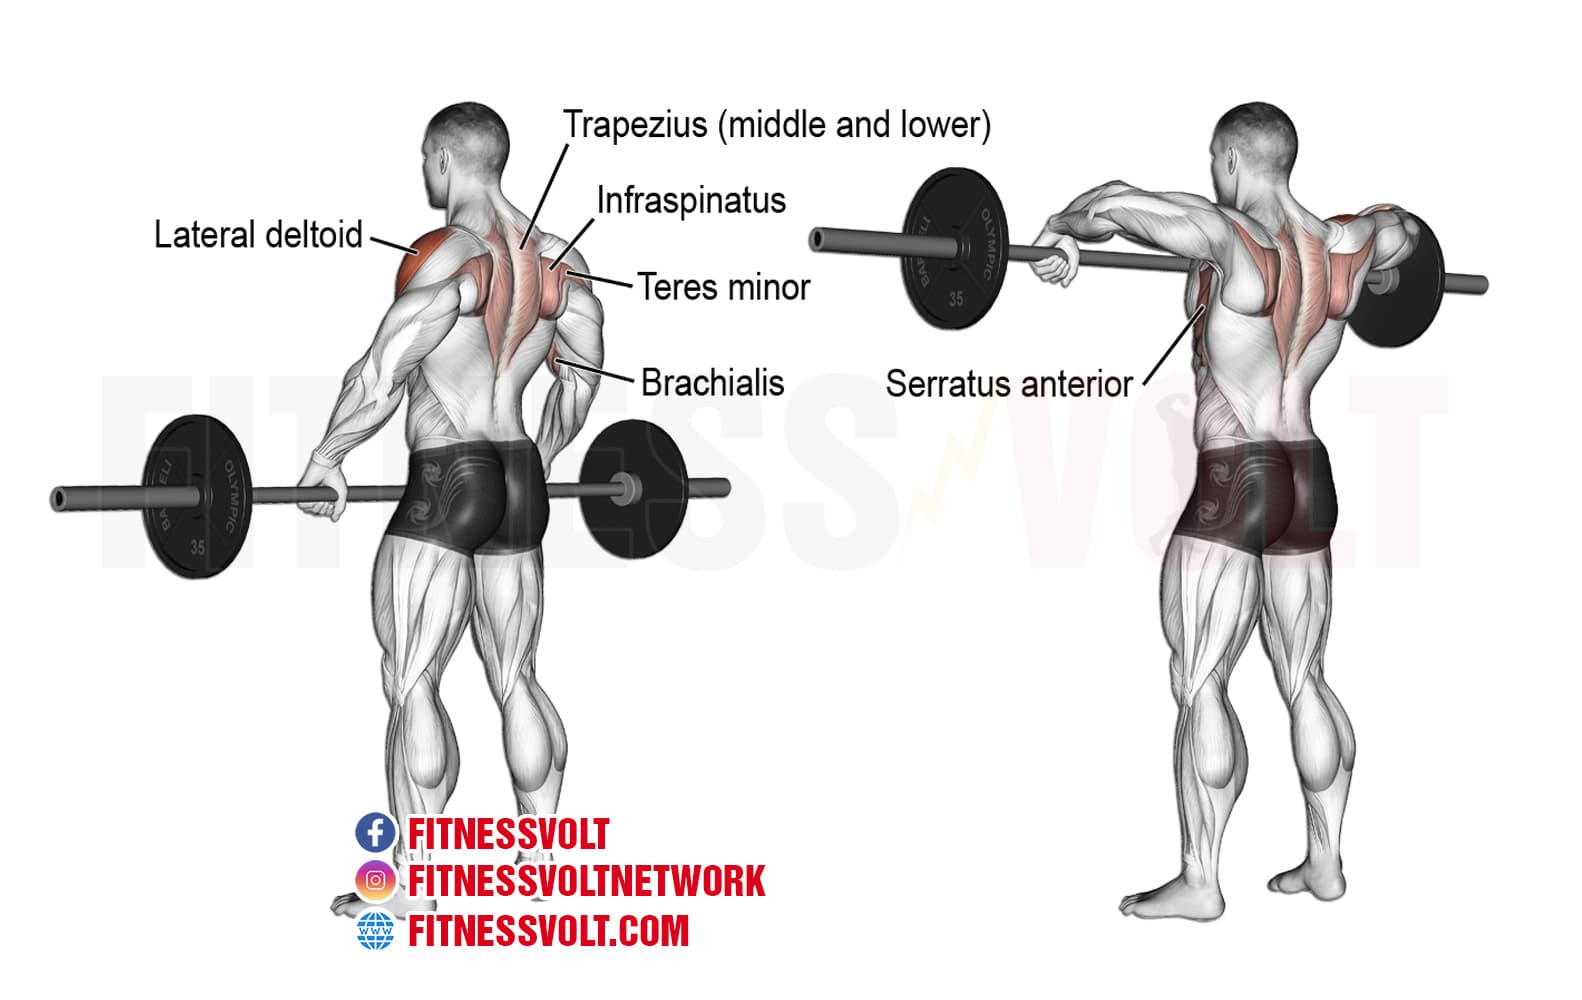
Rowing exercises are an essential part of a well-rounded workout routine. Wide grip rows, in particular, are an excellent exercise for building a strong back and improving overall upper body strength. In this article, we will discuss the muscles that are worked during wide grip row exercises and how to perform them correctly for maximum benefits.

Muscles Worked During Wide Grip Row
Wide grip rows primarily work the muscles in the back, including the latissimus dorsi, rhomboids, and trapezius. Additionally, the biceps and forearms are also activated to a lesser extent. Here's a breakdown of the muscles worked during wide grip row exercises:
- Latissimus Dorsi: The latissimus dorsi, or lats, are the largest muscle in the back and play a significant role in pulling movements. Wide grip rows target the lats, helping to increase their size and strength.
- Rhomboids: The rhomboids are located in the upper back and help to retract the shoulder blades. Wide grip rows work the rhomboids, helping to improve posture and upper back strength.
- Trapezius: The trapezius is a large muscle that runs from the neck down to the middle of the back. Wide grip rows target the lower portion of the trapezius, helping to improve posture and back strength.
- Biceps: The biceps are located in the front of the upper arm and are responsible for flexing the elbow. Wide grip rows work the biceps to a lesser extent, helping to improve overall arm strength.
- Forearms: The forearms are responsible for gripping and pulling movements. Wide grip rows work the forearm muscles, helping to improve grip strength.

How to Perform Wide Grip Rows
To perform wide grip rows, you will need a barbell or a cable machine with a wide grip attachment. Here's how to perform the exercise:
- Stand with your feet shoulder-width apart and hold the barbell with a wide grip.
- Bend your knees slightly and hinge forward at the hips, keeping your back straight.
- Pull the bar towards your chest, keeping your elbows close to your body.
- Squeeze your shoulder blades together at the top of the movement.
- Lower the bar back down to the starting position.
Repeat for the desired number of reps.
Tips for Performing Wide Grip Rows
To get the most out of your wide grip row exercises, follow these tips:
- Keep your back straight and engaged throughout the exercise.
- Keep your elbows close to your body to target the back muscles more effectively.
- Use a weight that challenges you but allows you to maintain proper form.
- Squeeze your shoulder blades together at the top of the movement for maximum contraction.
Incorporating Wide Grip Rows into Your Workout Routine
Wide grip rows can be incorporated into your back or upper body workout routine. Here's an example of how you can include wide grip rows in your workout:
- Warm up with 5-10 minutes of cardio.
- Perform 3 sets of 10-12 wide grip rows.
- Follow up with other back exercises, such as pull-ups, lat pulldowns, or seated rows.
- Finish with bicep and forearm exercises, such as bicep curls or wrist curls.

Conclusion
Wide grip rows are an effective exercise for building a strong back and improving overall upper body strength. By targeting the latissimus dorsi, rhomboids, trapezius, biceps, and forearms, wide grip rows provide a full upper body workout. Incorporate this exercise into your workout routine for a stronger, more defined back.
Related video of Wide Grip Row Muscles Worked

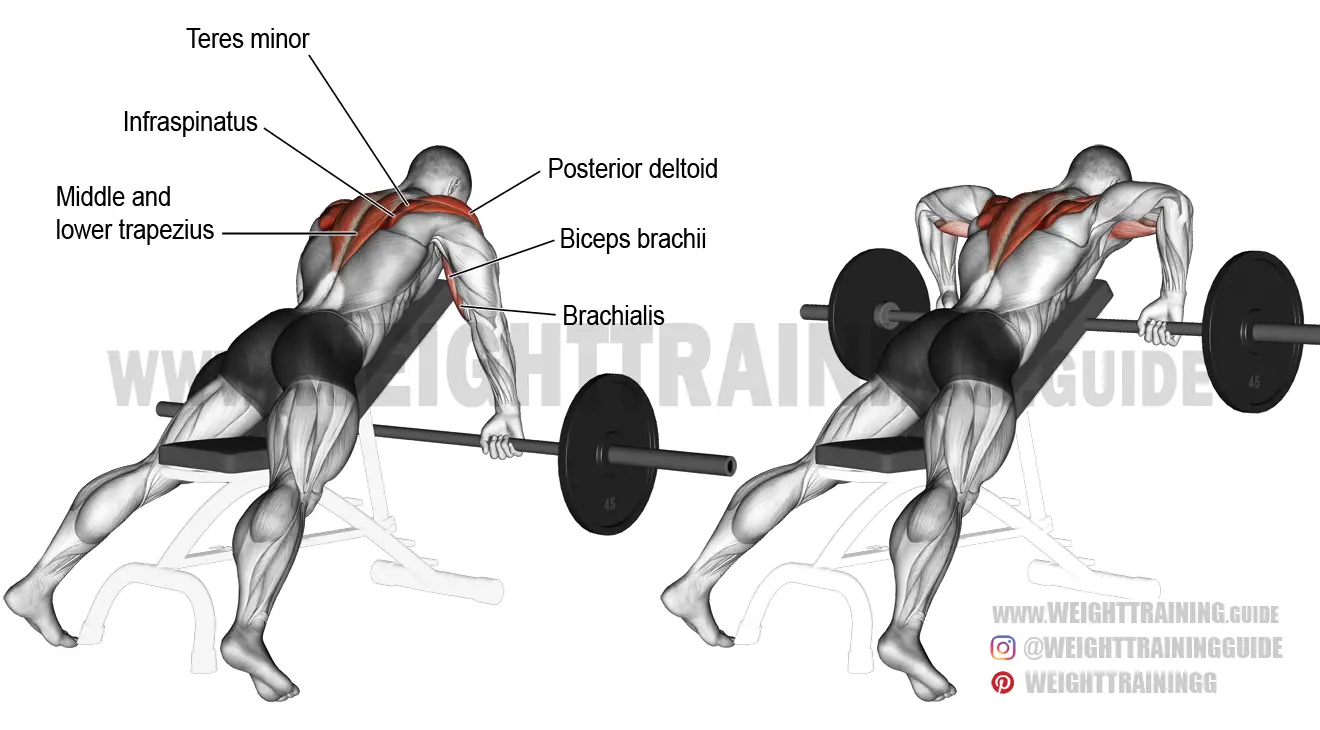
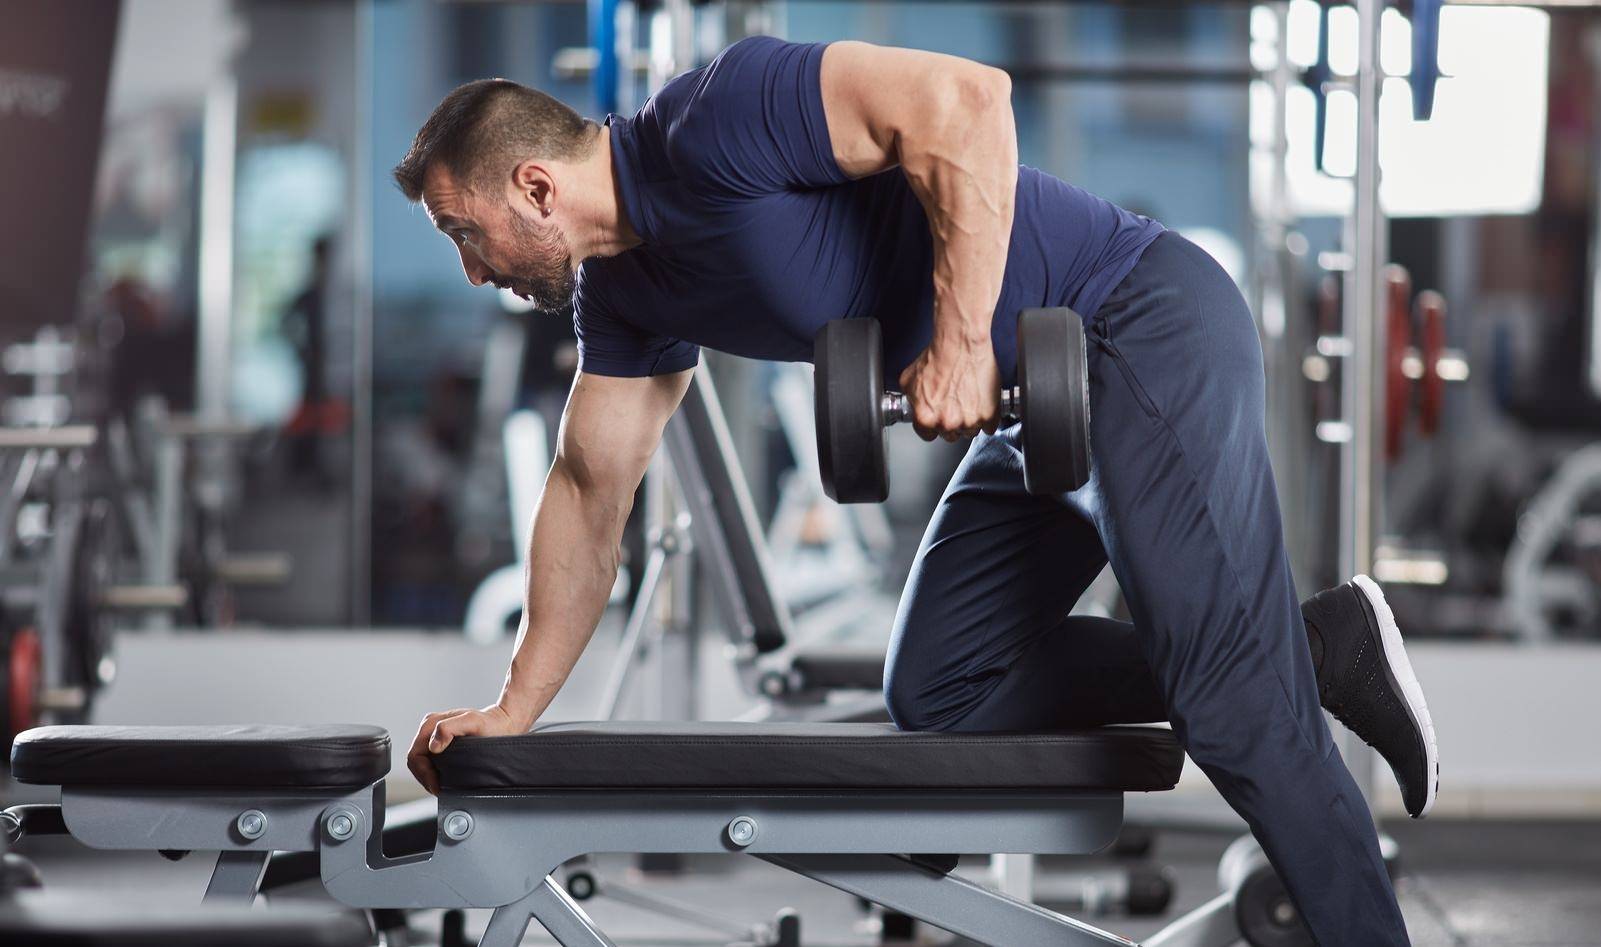
A dumbbell row is an exercise that targets the muscles of the upper back, including the lats, traps, and rhomboids. This exercise is performed by holding a dumbbell in one hand, bending over at the waist, and pulling the weight up towards the chest.
How to perform a dumbbell row

To perform a dumbbell row:
- Stand with your feet shoulder-width apart, knees slightly bent.
- Hold a dumbbell in one hand with your palm facing towards your body.
- Bend forward at the waist, keeping your back straight and your core engaged.
- Keep your elbow close to your body and pull the weight up towards your chest, squeezing your shoulder blades together at the top of the movement.
- Lower the weight back down to the starting position and repeat for reps, then switch sides and repeat.
Benefits of dumbbell rows

Dumbbell rows are a great exercise for building a strong, muscular back. Here are some of the benefits of including dumbbell rows in your workout routine:
- Increased upper body strength
- Improved posture and spinal alignment
- Reduced risk of back pain and injury
- Better overall athletic performance
- Improved grip strength
Variations of dumbbell rows

There are several variations of dumbbell rows that you can try to target different areas of the back and add variety to your workout routine:
- Single-arm dumbbell row
- Bent-over dumbbell row
- Renegade row
- T-bar row
- Inverted row
Tips for performing dumbbell rows
Here are some tips to help you get the most out of your dumbbell row exercise:
- Start with a lighter weight and focus on proper form before increasing the weight.
- Keep your core engaged and your back straight throughout the movement.
- Avoid jerking or swinging the weight, and use a controlled motion.
- Exhale as you pull the weight up, and inhale as you lower it back down.
- Include dumbbell rows in your regular workout routine for best results.
Conclusion
Dumbbell rows are a simple yet effective exercise for building a strong, muscular back. By incorporating this exercise into your regular workout routine and using proper form and technique, you can reap the many benefits of this versatile exercise.
Related video of What Is A Dumbbell Row?

Deadlifts are one of the most popular exercises performed in the gym. But have you ever tried the Db Single Leg Rdl? This exercise is a great alternative to traditional deadlifts for those looking to switch things up, target the hamstrings and glutes, and challenge their balance and stability.
What is the Db Single Leg Rdl?

The Db Single Leg Rdl (or dumbbell single leg Romanian deadlift) is a unilateral exercise that targets the hamstrings, glutes, and lower back. It involves standing on one leg while holding a dumbbell in the opposite hand and hinging forward at the hips, keeping the back straight and the core engaged.
How to Perform the Db Single Leg Rdl

Here are the steps to perform the Db Single Leg Rdl:
- Stand with your feet hip-width apart, holding a dumbbell in your right hand with your palm facing towards your body.
- Lift your left leg slightly off the ground, keeping your knee slightly bent.
- Begin hinging forward at the hips, keeping your back straight and your core engaged.
- Lower the dumbbell towards the ground, keeping it close to your body.
- Pause when you feel a stretch in your hamstrings, then slowly return to the starting position.
- Repeat for the desired number of reps, then switch sides.
Tips for Proper Form

To perform the Db Single Leg Rdl with proper form, keep these tips in mind:
- Keep your core engaged and your back straight throughout the movement.
- Keep your shoulders back and down, and your chest up.
- Focus on hinging at the hips, rather than bending at the waist.
- Keep your weight evenly distributed between your standing foot and your lifted foot.
- Start with a lighter weight to ensure proper form, then gradually increase the weight as you get stronger.
- Keep your gaze focused on a fixed point on the ground to help with balance.
Variations of the Db Single Leg Rdl

Here are some variations of the Db Single Leg Rdl to try:
- Perform the exercise with both hands holding dumbbells, rather than just one.
- Perform the exercise with a barbell instead of dumbbells.
- Perform the exercise with your lifted leg straight, rather than bent.
- Perform the exercise on a Bosu ball or other unstable surface to challenge your balance and stability.
Benefits of the Db Single Leg Rdl

Here are some of the benefits of the Db Single Leg Rdl:
- Targets the hamstrings, glutes, and lower back.
- Improves balance and stability.
- Helps correct muscle imbalances between the left and right sides of the body.
- Can be performed with just a pair of dumbbells, making it a great exercise to do at home or while traveling.
- Provides a new challenge to those who are familiar with traditional deadlifts.
When to Incorporate the Db Single Leg Rdl into Your Workout Routine

The Db Single Leg Rdl can be incorporated into your workout routine in a variety of ways:
- As a warm-up exercise to activate the hamstrings and glutes before a leg workout.
- As a standalone exercise to target the hamstrings and glutes.
- As a finisher exercise to completely fatigue the hamstrings and glutes.
- As an accessory exercise to complement traditional deadlifts and other lower body exercises.
Precautions and Contraindications

As with any exercise, the Db Single Leg Rdl should be performed with caution and under proper supervision. Here are some precautions and contraindications to keep in mind:
- Avoid this exercise if you have any lower back or hip injuries.
- If you have any balance or stability issues, start with a lighter weight or perform the exercise near a wall or other support.
- If you experience any pain or discomfort during the exercise, stop immediately and seek medical advice.
- Always consult with your doctor or a qualified fitness professional before starting any new exercise program.
Conclusion
The Db Single Leg Rdl is a great exercise to add to your lower body workout routine. It targets the hamstrings, glutes, and lower back, improves balance and stability, and can be performed with just a pair of dumbbells. Remember to perform the exercise with proper form, start with a lighter weight, and consult with a doctor or fitness professional before starting any new exercise program.